The 5800SS1 is a wireless shock sensor intended for use in systems that support 5800 series devices. Each transmitter has its own unique serial number, assigned during manufacture, which must be “enrolled” in the control panel before the device can be used with the system. Refer to the control panel’s Installation and Setup Guide for programming details.
One 5800SS1 is required for each pane of glass protected. (Do not use more than one sensor per pane.)
Types of Glass Protection
- Tempered
- Ordinary Plate
- Sealed Insulated
ENROLLING THE 5800SS1
You must enroll the 5800SS1 serial number in the control panel using zone programming. Refer to the control panel’s Installation and Setup Guide for detailed programming procedures. Before programming, perform the following:
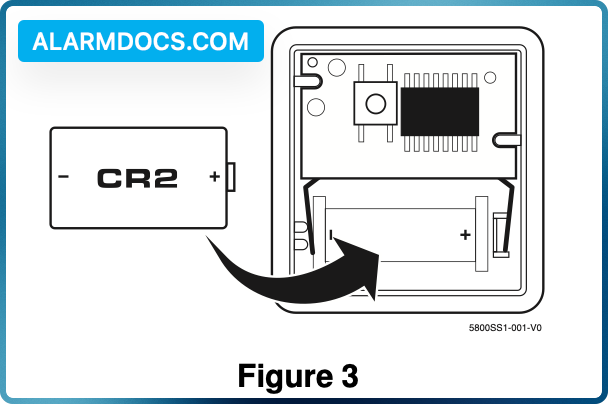
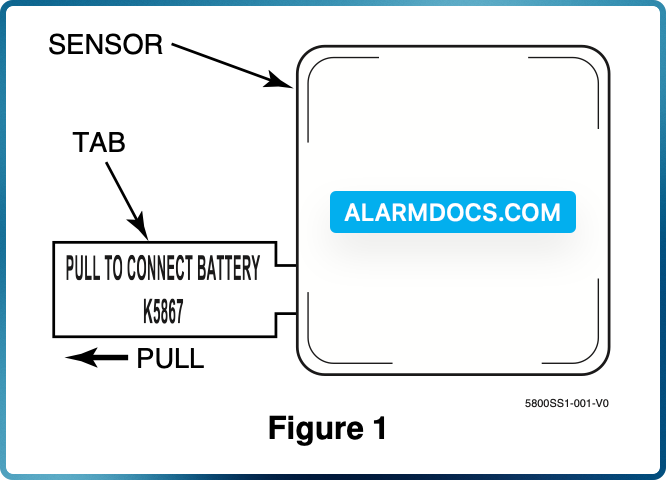
1. To cause the transmitter to transmit, remove the “PULL TO CONNECT BATTERY” tab (see Figure 1). (For additional transmissions, lightly tap on the base of the sensor with a screwdriver.)
2. When programming the shock sensor, note the following:
- Input Type = 3 (Supervised RF)
- Loop Number = 1
3. When prompted for the serial number, you can transmit by lightly tapping on the base of the sensor with a screwdriver (pause 2 seconds between taps) or by manually entering the serial and loop number.
MOUNTING
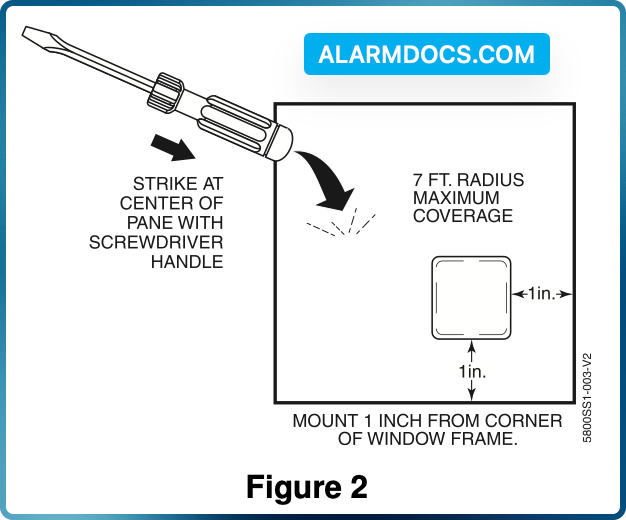
1. Before the transmitter is permanently mounted, determine the optimum mounting location. For best sensitivity, the sensor should be mounted one-inch from the corner edge of the window frame (see Figure 2).
2. Conduct Go/No Go tests (see control’s instructions) to verify adequate signal strength from the mounting location to the Alarm System receiver.
Verify range by taping (with masking tape) the sensor in the approximate mounting location and tapping at the base to initiate a fault transmission. The panel (in the Go/No Go test mode) should respond to the transmissions. If not, find a more suitable mounting location, possibly on the opposite corner of the window.
3. After successful testing. Clean the glass, where the sensor will be mounted, with a mixture of water and isopropyl alcohol.
4. Once the glass has dried, remove the tape backing paper and firmly press the sensor in the desired mounting location.
5. Verify operation by striking the center of the glass with the handle of a large screwdriver. Always check the alarm panel keypad to verify that the correct zone has tripped.
6. Apply optional “WARNING” label to the outside glass surface opposite the tape side of the 5800SS1.
REPLACING THE BATTERY
- Using a screwdriver, carefully remove the sensor’s cover.
- Check the battery polarity orientation before installing (see Figure 3). Insert the battery securely in the sensor.
- Snap the sensor cover back in place.