The PGx911 is a fully supervised, 2-way wireless outdoor siren, designed for installation in areas in which wiring action is difficult or impossible.
Features
- Built-in link quality indicators reduce installation time by eliminating the need for the installer to physically approach the alarm controller.
- Power supply is dual, non-rechargeable batteries.
- Multiple sound types: Burglar (between 1400Hz – 3200Hz), fire, CO and flood.
- Entry/Exit beep can be enabled via the control panel to sound once the user has armed the system and once the user has entered the protected area.
- Squawk (beep) sounds can be configured via the control panel to indicate alarm system arming (1 squawk) and disarming (2 squawks) by a wireless key.
- Double Tamper protection sends a tamper alarm to the system if the siren front panel is removed or if the siren is removed from the wall.
- Pressing the self-test button momentarily activates the LEDs and sounder indicating the siren is operating correctly.
Operation
- Siren and strobe light activates when an event message is received from the system.
- If the siren is tampered with while armed, the siren transmits a tamper message to the control panel. The control panel determines whether to activate the siren. If the siren does not receive an acknowledge message from the alarm system, the siren functions independently.
- When the battery voltage is low, a low battery message is sent to the alarm system. After message delivery, at least 2 siren alarms are possible before the siren battery is totally depleted.
Device Setup
Installing or replacing the batteries
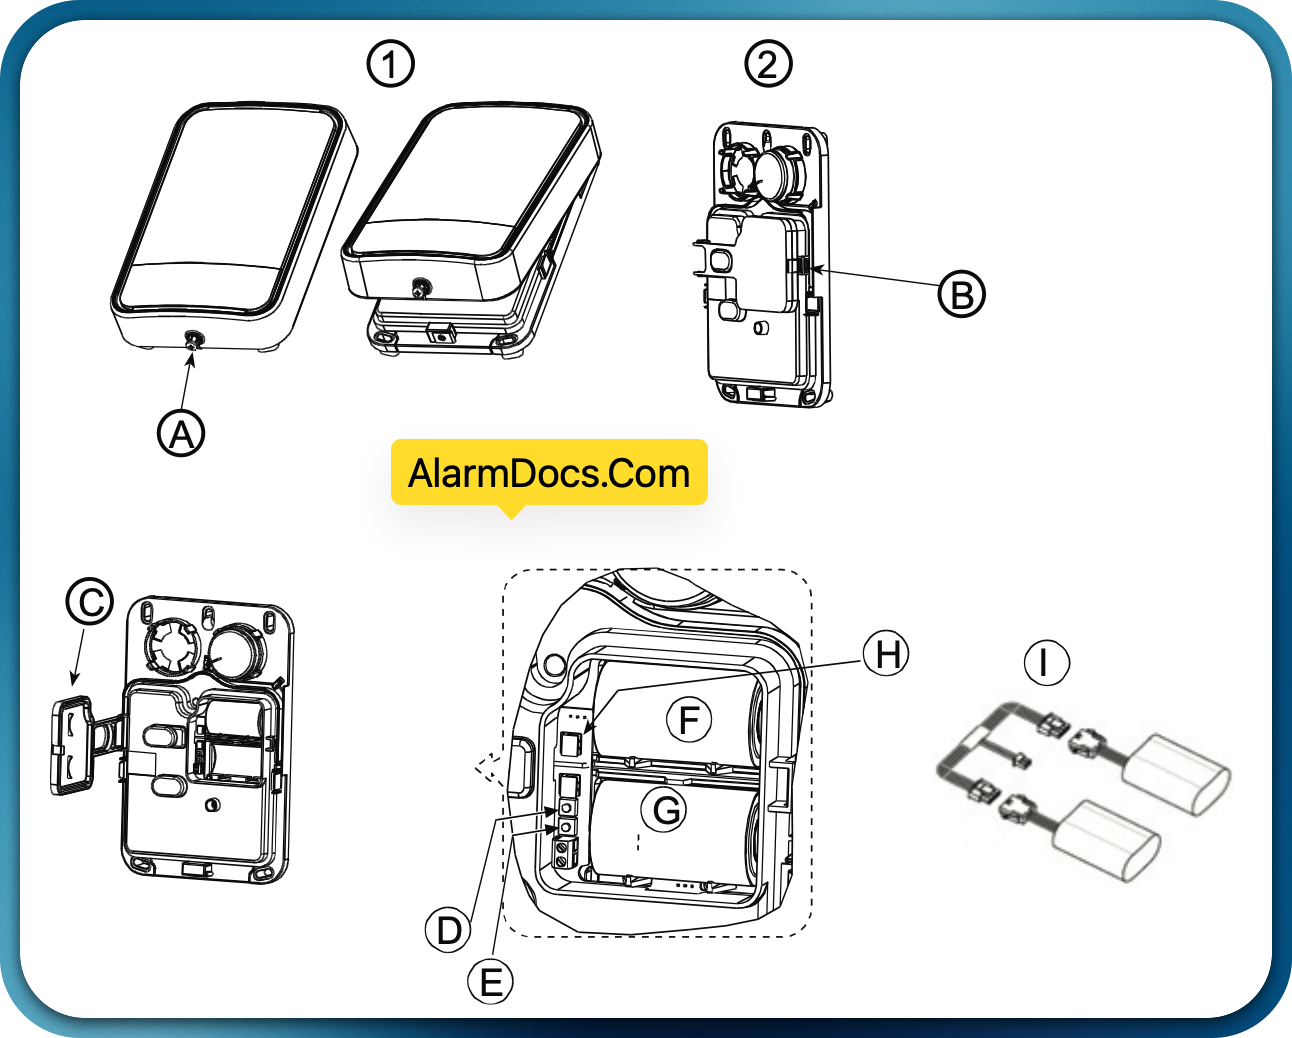
1. Loosen plastic cover screw and remove the cover. (A)
2. Release catch (B) and open battery cover (C).
3. Using the cable adapter, connect batteries to the proper connectors. (l)
Enroll the Device into the System
Quick Enroll
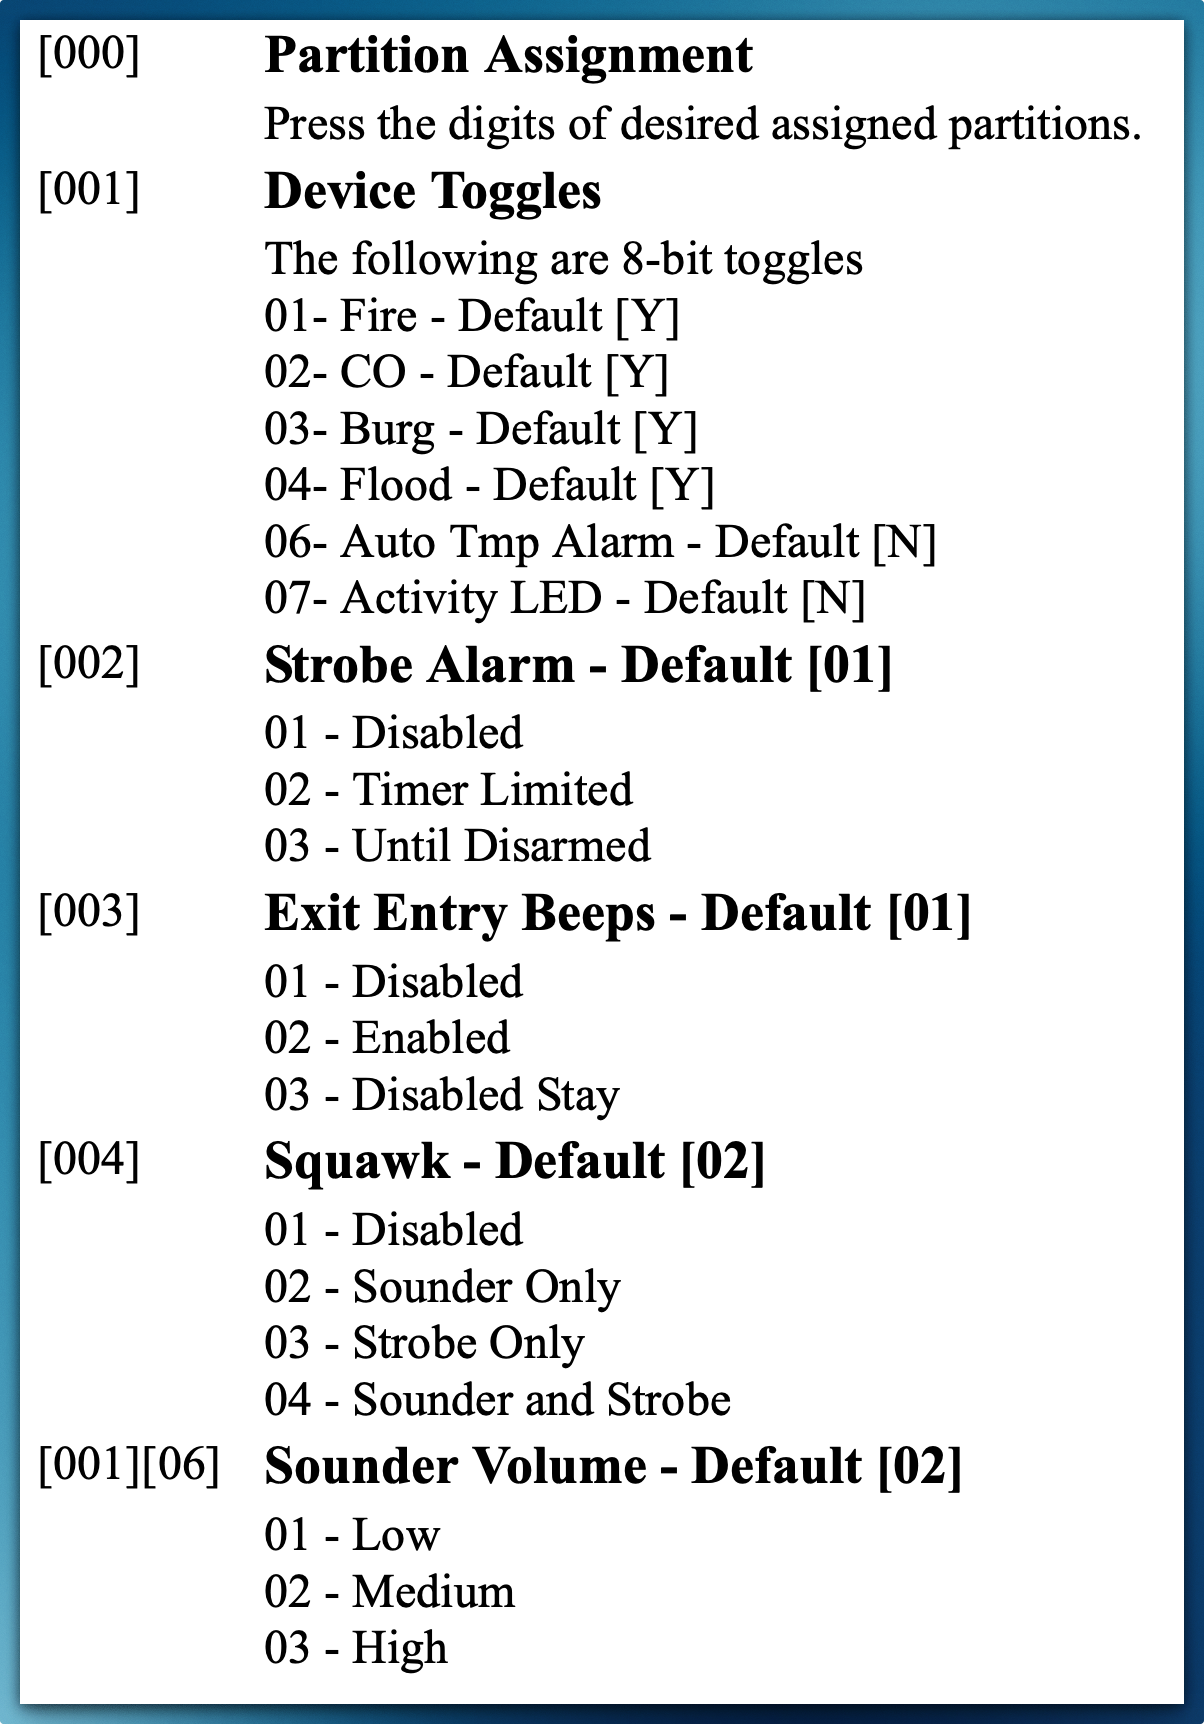
- On a keypad press [*] [8] [Installer Code] [804] [000].
- Press and hold the device enroll button until the LED lights steady and then release the enroll button while the LED is still lit. A confirmation message then appears on the keypad.
- Press [*] key to confirm ID.
- Enter [3 digit siren #].
- Enter [1 digit partition #] for all desired partitions and press [#]. If using an LCD keypad you can scroll to the desired partitions and press [*] to toggle the partition.
- On an LCD keypad enter the label by using word library.
Pre-enroll
- Remotely configure the unique ID number into the system. For more information see the HSM2HOST manual.
- When on-site, press the device enroll button.
Local Diagnostics and Placement Test
Before permanently mounting any wireless device it is recommended to mount the device temporarily and perform a Local Diagnostics test.
- Before testing, remove the plastic cover.
- Press the self-test button once and release it; The red LED will switch ON and then OFF, the green LED will switch ON and then OFF, the strobe light will switch ON and then OFF and the piezo siren will sound to indicating that the siren is fully operational.
- After 2 seconds the LED blinks 3 times indicating the signal strength.
The following table indicates the received signal strength.
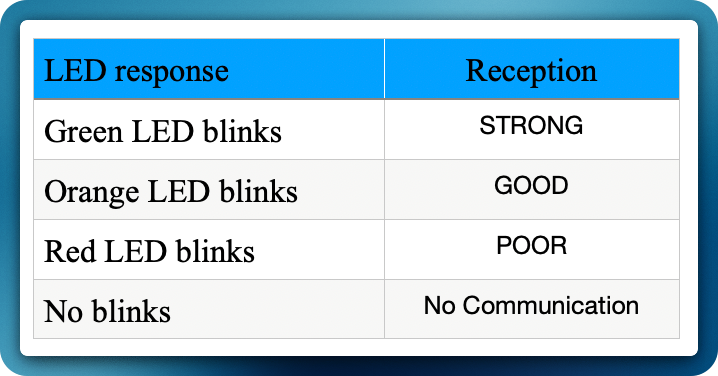
IMPORTANT! Only GOOD or STRONG signal strengths are acceptable. If you receive a POOR signal from the device, re-locate it and re-test until a GOOD or STRONG signal is received.
Note: For UL/ULC installations, only STRONG signal levels are acceptable. After installation verify the product functionality in conjunction with the compatible receivers HSM2HOST9, HS2LCDRF(P)9, HS2ICNRF(P)9 and PG9920.
Note: For detailed Placement instructions refer to the control panel Reference Guide.
Mounting the Device
Important: The equipment is FIXED, WALL MOUNT and shall be installed and serviced by SERVICE PERSONS ONLY. The equipment enclosure must be FULLY ASSEMBLED and CLOSED, with all the necessary screws • Instruct the END USER to: DO NOT attempt to service this product; Opening or removing covers may cause exposure to dangerous voltages or other risks. • DO NOT THROW the battery into a fire or water. Disposing the battery in a fire will cause rupture and explosion; DO NOT DISPOSE of the waste battery as unsorted Thyonil Chloride waste. Consult your local rules and/or laws regarding recycling of this Lithium battery; It will help protect the environment by reducing the number of batteries consumed. Risk of fire OR explosion if the battery is not properly connected; Avoid short circuit; Do not expose batteries to temperatures above 100°C; Do not use water in case of battery leakage. Refer to the MSDS of battery for more details.
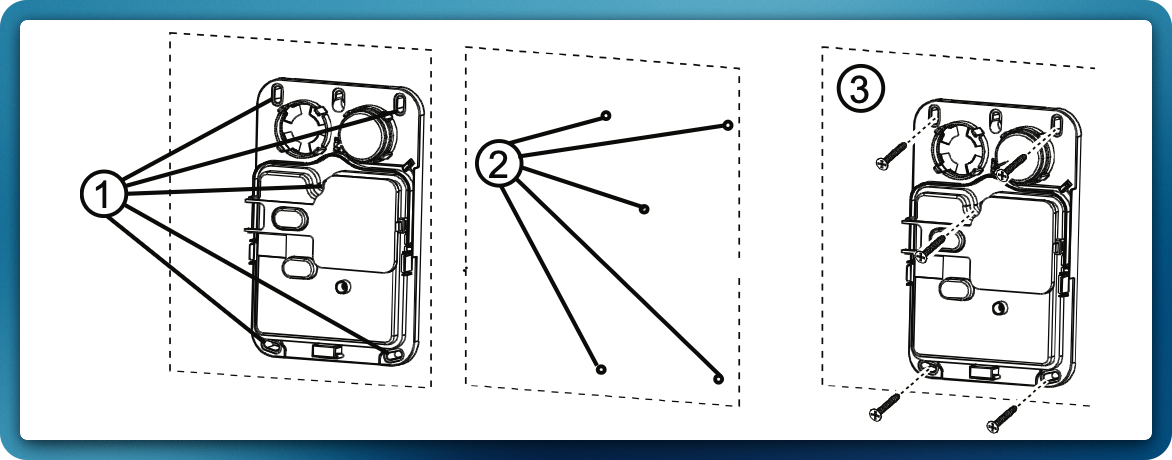
- Mark for drilling.
- Drill 5 holes.
- Fasten with 5 supplied screws.
Configuration
To enter the wireless configuration section enter [804][551-566].