Format the HDDs before recording. Click Start > Settings > Record > Mode Settings to go to the mode settings interface. You can set the record time under the “Manual Record Settings” and then click “Apply” to save the settings. There are two record modes: auto mode and manual mode.
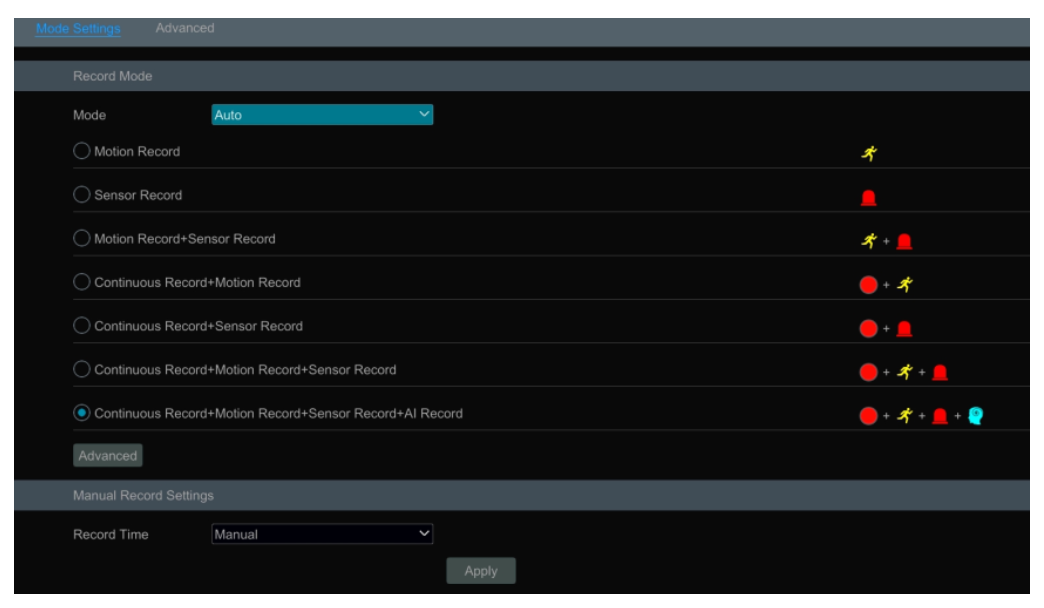
Auto Mode
Motion Record: Motion alarm record will be enabled when motion alarm happens.
Sensor Record: Sensor alarm record will be enabled when sensor alarm happens.
Motion Record+Sensor Record: Motion/sensor alarm record will be enabled when motion/sensor alarm happens.
Continuous Record+Motion Record: Normal record is enabled all the time; motion alarm record will be started when motion alarm happens.
Continuous Record+Sensor Record: Normal record is enabled all the time; sensor alarm record will be started when sensor alarm happens.
Continuous Record+Motion Record+Sensor Record: Normal record is enabled all the time; motion/sensor alarm record will be enabled when motion/sensor alarm happens.
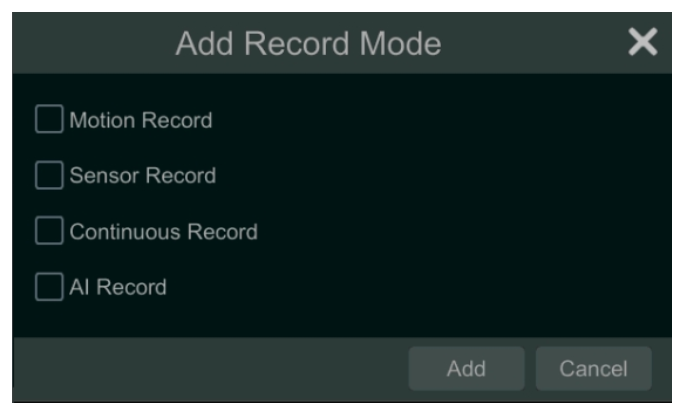
Continuous Record+Motion Record+Sensor Record+ AI Record: Normal record is enabled all the time; motion/sensor/analytics alarm record will be enabled when motion/sensor/intelligence analytics alarm happens. You can add more auto modes on intelligence record. Click “Advanced” button to pop up a window as shown below. Check the modes in the window and then click “Add” button to show the modes in the record mode list (in the window, the checked modes can be showed in the record mode list while the unchecked modes cannot; you shall check “AI Record”).
Select one auto mode to pop up the corresponding window. Set the encode, GOP, resolution, FPS, bitrate type, quality, max bitrate and audio of each camera and then click “OK” to save the settings. Please adjust the parameters according to the actual condition.
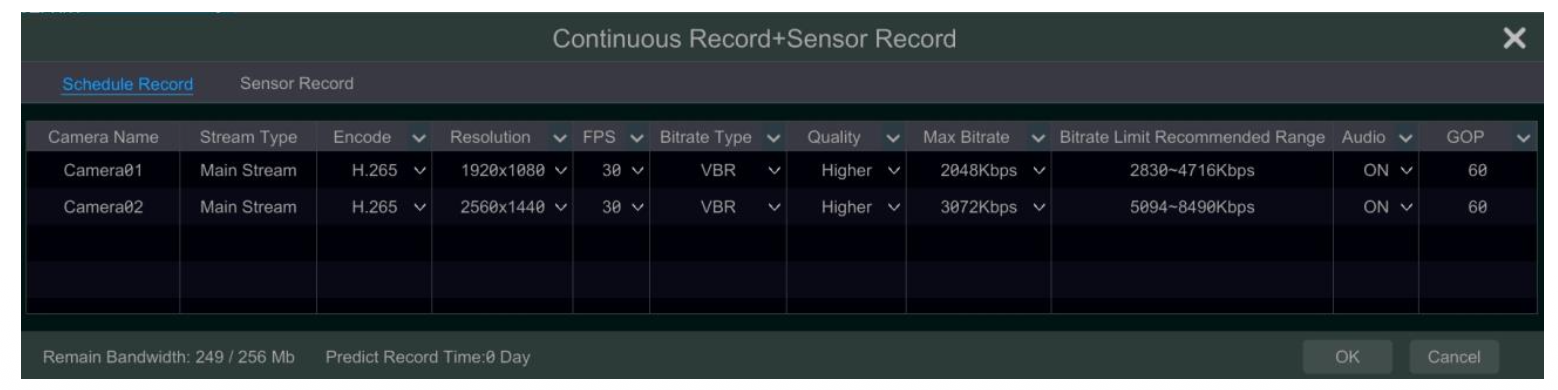
Video Encode: the available options will be H.265 and H.264 if the connected IP camera supports H.265, or the option will be H.264 only.
GOP: group of pictures.
Resolution: the higher the resolution is, the clearer the image is.
FPS: the higher the frame rate is, the more fluency the video is. However, more storage room will be taken up.
Bitrate Type: CBR and VBR are optional. CBR means that no matter how much change is seen in the video scene, the compression bitrate will be kept constant. VBR means that the compression bitrate will be adjusted according scene changes. For example, for scenes that do not have much movement, the bitrate will be kept at a lower value. This will help to optimize the network bandwidth.
Quality: When VBR is selected, you need to choose image quality. The higher the image quality you choose, the more bitrate will be required. Max Bitrate: 32Kbps ~10240Kbps are optional.
Customization Mode
If the customization mode is selected, you need to set the record schedules of each camera. See Schedule Settings for details.